I was feeling in the mood for some pumpkin soup the other day, so I did what I usually do if I am not sure of a recipe - I googled it, then combined what I liked best about each recipe into a new one of my own. I was looking at Asian soup recipes and if I didn't have the ingredients they asked for (or didn't know what they were!) I improvised. The resulting soup was so good!
I put all these ingredients in my vitamix (I used the canned pumpkin and sweet potatoes just because I didn't have fresh) then blended. A vitamix will cook the ingredients right in the container, but if you do not have one, place all the ingredients in a sauce pan and blend after it is all heat through, or if you are using fresh pumpkin and sweet potatoes, you have to cook them through before you do any blending, obviously. See below for the best way to cook fresh pumpkin.
5 cups chicken broth
3 cups cubed and peeled pumpkin, or one 15 oz can pumpkin
2 sweet potatoes cubed and peeled, or one 15 oz can sweet potatoes, drained
1/2 of a 15 oz can coconut cream (Not coconut milk, get the one with the least amount of sugar)
2 Tablespoons coconut oil
2 Tablespoons minced fresh ginger - use fresh! You can get it in tubes if you want.
1/2 tsp dried onion powder (or saute some fresh onions - I think I used fresh?)
Dash of dried garlic powder
1 Tablespoon lemon juice
2 Tablespoons lime juice
1/8 tsp chili powder
1 tsp ground cumin
1/2 cup of fresh basil (don't leave this out, it is awesome)
If you are making this in a pot, simmer until all the pumpkin and sweet potatoes are tender, then blend and serve. Makes about 8 cups of soup.
It is so delicious! This does not taste like pumpkin pie! The sweetness combined with the ginger, basil, lime, and spices - just great! Everybody loved this soup, even the doubters : ) Hope you enjoy!
Here's how to cook fresh pumpkin easily. Using a sharp, heavy knife, chopped the pumpkin into large chunks very carefully. Use a spoon to scrap out all the seeds and membrane. Steam the pumpkin chunks, with the rind still on, for about 30-40 minutes until it is very soft. Wait until the chunks are cool enough to handle, then use a spoon to scrape the cooked flesh away from the rinds. It's messy, but easier then trying to peel a fresh (hard) pumpkin. We cook all large squash varieties this way too.
Friday, October 14, 2011
Wednesday, July 20, 2011
What the Bird Said Early In the Year - By C.S. Lewis
I heard in Addison's Walk a bird sing clear
'This year the summer will come true. This year. This year.
'Winds will not strip the blossom from the apple trees
This year, nor want of rain destroy the peas.
'This year time's nature will no more defeat you,
Nor all the promised moments in their passing cheat you.
'This time they will not lead you round and back
To Autumn, one year older, by the well-worn track.
'This year, this year, as all these flowers foretell,
We shall escape the circle and undo the spell.
'Often deceived, yet open once again your heart,
Quick, quick, quick, quick!—the gates are drawn apart.
Tuesday, June 28, 2011
Insect Control with the Water Wand
This summer I have been trying out a new device to control spider mites, aphids and other garden pests.


It is a store bought water wand with a head that can rotate to various angles, that has been extended with an adaption. The extension in length allows you to comfortably stand upright as you spray the underside of the plants leaves with the water wand's head resting on the ground. The head is adjusted to spray upward at a nighty degree angle. This makes spraying the underside of the plants leaves so easy and really saves your back. I have used a water wand without the extension, but it is a struggle to get the wand at the right angle to spray the underside of the leaves, and you have to stoop over to get the wand up under the bottom leaves of the plant.
Friday, June 3, 2011
Why I love Swiss Chard

Here I am with a bucket of one of my favorite greens - Swiss Chard. This is one of two buckets I picked that day from around the edges (outer leaves) of four chard plants. Why do I love chard? For one thing you dont have to replant it every year since its a perennial. Every year it just gets bigger and better and I can pick on it almost all winter. Chard has very few pests and is heat and drought tolerant. You can use it in anything you would use spinach in (except fresh salads) and it is so good for you.


Swiss Chard cooks down a lot. Here is what was left of that mountain once it was cooked. Two very large bowls of stems and one large bowl of greens. Its enough chard for 6 meals though. Use any Southern greens recipe for Swiss chard, but don't forget the vinegar when cooking the stems or they will turn brown.

Nothing to do with Swiss Chard, but Claire finally got a picture of the critter that has been digging holes all over the back yard. A big Armadillo! He is hiding under my rain barrel in this picture. Since he eats grubs, I don't mind him too much.
Tuesday, May 24, 2011
Onion Subirrigation, Onions in clumps, Herbal Tea Garden, Companion Planting

Another thing I was trying here was planting the onions in groups instead of the traditional rows. I had read on another blog that you could plant them in a clump and the onions would have no problem pushing themselves away from each other as they grew. I found that this worked very well, and it saved a lot of room. I planted my usual three bundles of onion sets in a fraction of the space they usually use up when strung out in long rows. My three onion set bundles were clustered around about 6 buried bottles with about 20 -25 onions around each bottle.

Onions from around one bottle.


All my onions drying before I put them in onion braids. By my estimation I have about my usual onion harvest, with about the same ratio of big and little onions. Admittedly I could do a better job at growing onions period, but I haven't yet done an extensive study of growing onions in a low maintenance garden.
Here is a picture of my herbal tea garden the family planted a few years ago using sheet mulching over the lawn to get it established. This year I changed the direction of the rows so that I have a circle within a circle. This gave me more planting space. The garden is coming along fine and I added quite a few plants this year - apple and pineapple mint, more lavender, cat nip (protected by the can to keep the cats from rolling on it), bee balm, anise hyssop, cat mint, rue and verbena.
I have been reading a lot about permiculture on-line and I realized I had made a mistake by separating my flowers and vegetables from each other - flowers in front yard and vegetables in back yard. I should have know better since my inspiration was my French Grandmother's pottage type garden. My herbal tea garden in the front was buzzing with bees and beneficial insects, but in the flower free vegetable garden there was nothing there for the beneficial insects to eat. I had read about companion planting before but thought it was some funky wives tale. I had an "Ahha" moment when I realized the purpose was to give beneficial insects places to hide and feed, so that they would lay eggs on your vegetable plants. Then their larvae will attack vegetable pests. I went right out and bought a bunch of my favorite flowers (what a great excuse!), and not so favorite marigolds, and some clover seed, and planted a row of this right down the middle of my vegetable garden.
I chose to plant a row of permanent perennials flowers (with the annual marigolds) to keep the work to a minium every year. Since I rotate my veggies around the garden every year I will not have to rotate and plant a bunch of annual flowers too. I can cut clover and other plants like comfrey when I get them and use them as mulches around the plants that would benefit from that companion. The flowers will attract beneficial insects and the marigolds will hopefully concentrate aphids away from my other plants. This will be an ongoing experiment.

This last not very good picture is of a blue mud dauber on my parsley blossom. A lot of these were buzzing around in the tea garden. It was windy and I could not get a very good shot. Anyway I had fun watching them and did a little research on them later. It turns out that the adults eat pollen and nectar, and the larvae eat the spiders that the adults stuff in with them when they make their mud daubers nests. The blue mud dauber particularly likes Black Widow spiders, so its all right by me. I call that a beneficial insect.
Friday, April 22, 2011
Spring Garden Update 2011
We have been busy in the garden here at home switching the rows around so the vegetable garden is in 7 blocks of 8 feet by 16 feet each. I want to have less bare earth this year and more plants. We have also invested in more 12 and 10 inch clay pots to use in our subsurface irrigation. I was fortunate in coming across a grocery store that was phasing out its garden section and picked up some 12 inch pots for less than a quarter of their usual price.

Here is a close up of a 12 inch clay pot buried in the ground and filled with water. The hole is plugged with plumbers putty. The lid is a cheep plastic plate which usually has a rock on top to keep it from blowing away. The pots will slowly leak moisture to the surrounding garden soil. This is a very efficient way to water the plants planted near the pots. These pots use much less water even then drip irrigation. Water only goes to the plants around the pot, not all over the garden, and as the plants dry out the soil, they pull just the moisture they need from the pots. You can see a just sprouted squash plant next to the pot.

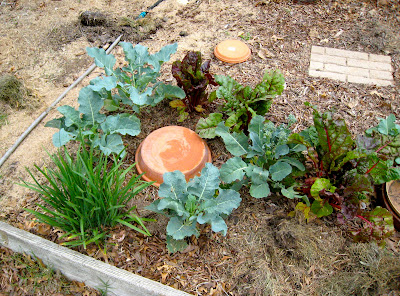
Here is one with a circle of broccoli, Swiss chard and chives around it. These were transplants. I gave them supplemental water for a few weeks to get them started, then they only receive water from the buried pot after that. Last year I cut my water use for gardening in half by using, rain barrels in the spring, subirrigation, and grey water in the summer.
Another benefit of using the buried pots is that, without water running across the soil surface less weed seeds sprout. Using this method in conjunction with heavy mulching, I hardly ever have to pull any weeds.
In the garden right now: broccoli, swiss chard, onions, potatoes, peas, lettuce mix, garlic, beets, tomatoes, many kinds of peppers, egg plant, many kinds of squash and cucumbers.


Here is a close up of a 12 inch clay pot buried in the ground and filled with water. The hole is plugged with plumbers putty. The lid is a cheep plastic plate which usually has a rock on top to keep it from blowing away. The pots will slowly leak moisture to the surrounding garden soil. This is a very efficient way to water the plants planted near the pots. These pots use much less water even then drip irrigation. Water only goes to the plants around the pot, not all over the garden, and as the plants dry out the soil, they pull just the moisture they need from the pots. You can see a just sprouted squash plant next to the pot.

The pots are about 3 feet apart and I plant around them in a circle.
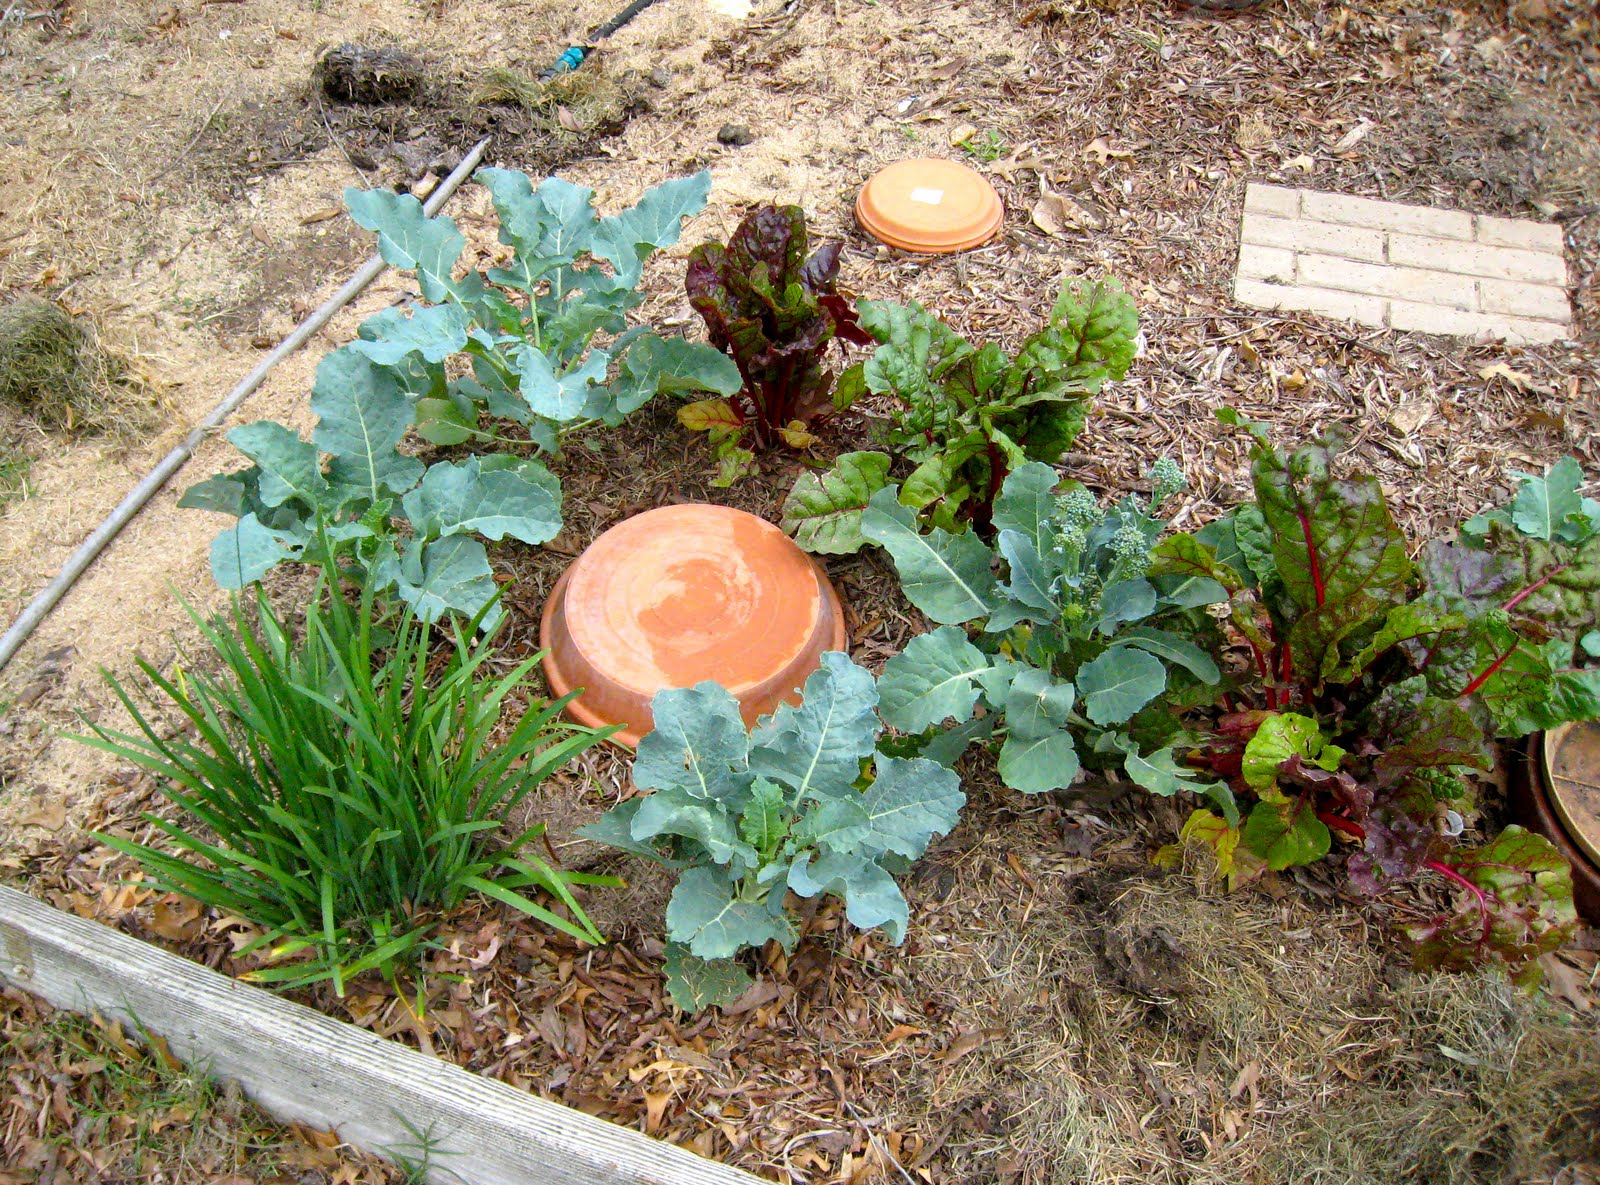
Here is one with a circle of broccoli, Swiss chard and chives around it. These were transplants. I gave them supplemental water for a few weeks to get them started, then they only receive water from the buried pot after that. Last year I cut my water use for gardening in half by using, rain barrels in the spring, subirrigation, and grey water in the summer.
Another benefit of using the buried pots is that, without water running across the soil surface less weed seeds sprout. Using this method in conjunction with heavy mulching, I hardly ever have to pull any weeds.
In the garden right now: broccoli, swiss chard, onions, potatoes, peas, lettuce mix, garlic, beets, tomatoes, many kinds of peppers, egg plant, many kinds of squash and cucumbers.

A pretty picture to end with.
Subscribe to:
Posts (Atom)